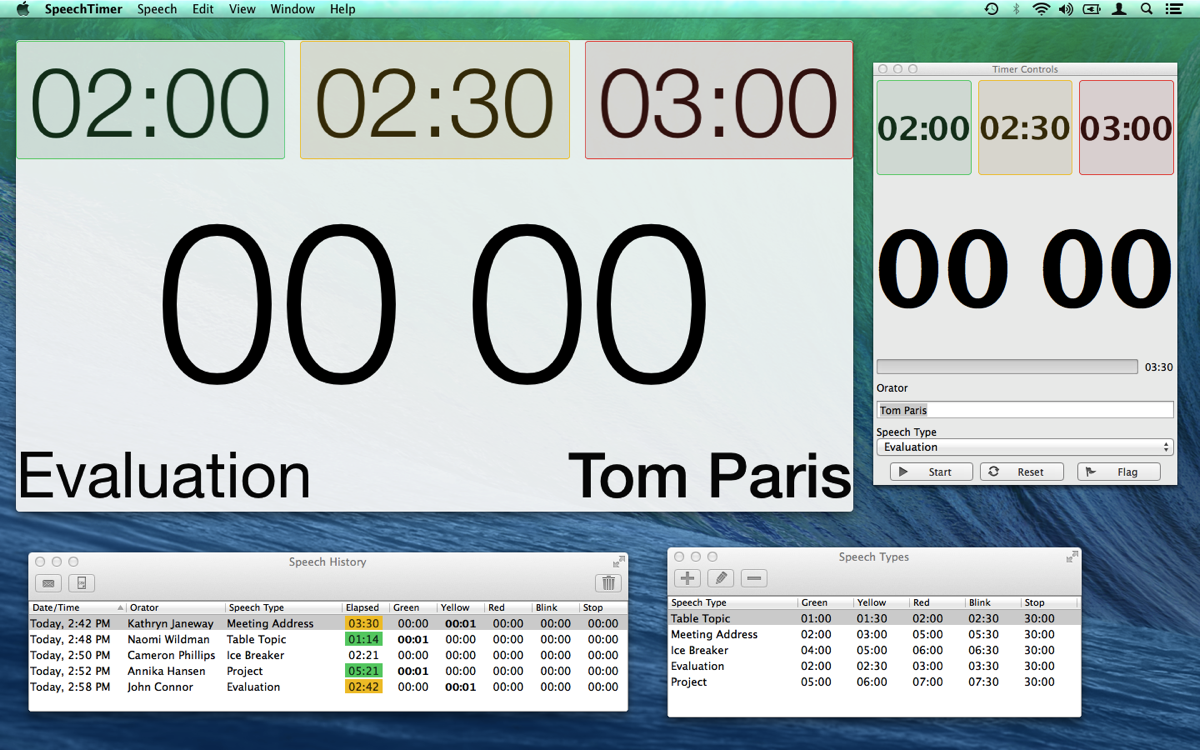
Speech Timer for macOS consists of four primary windows:
- Timer Controls
- Timer Display
- Speech History
- Speech Types
Timer Controls Window
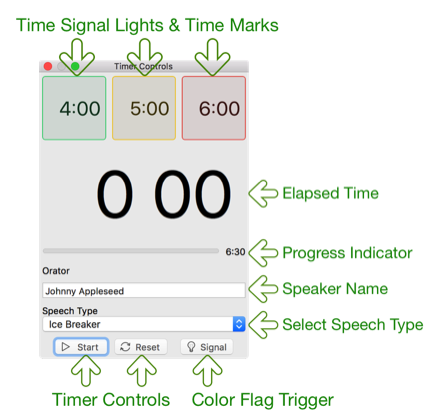
This small floating window is used to start/stop the timer, enter speaker name and choose the speech type being timed. You’ll want to place this window in the primary display where you can manipulate the timer discreetly. You can also use this window by itself when you’re practicing speeches alone in front of your Mac.
The “Flag” button will color the entire Timer Display Window green, yellow, or red as according to the current time mark – useful for alerting the speaker of the speech’s elapsed time. Note that this “Flag” button is only enabled when the Timer Display window is visible.
Flagging the Speaker
The “Flag” button will color the entire Timer Display Window green, yellow, or red as according to the current time mark – useful for alerting the speaker of the speech’s elapsed time. Note that this “Flag” button is only enabled when the Timer Display window is visible.
Timer Display Window
You’ll want to place the Timer Display Window in the secondary screen, on an overhead projector or television for everyone to see. This shows the time marks, current time, orator name, and current speech type.
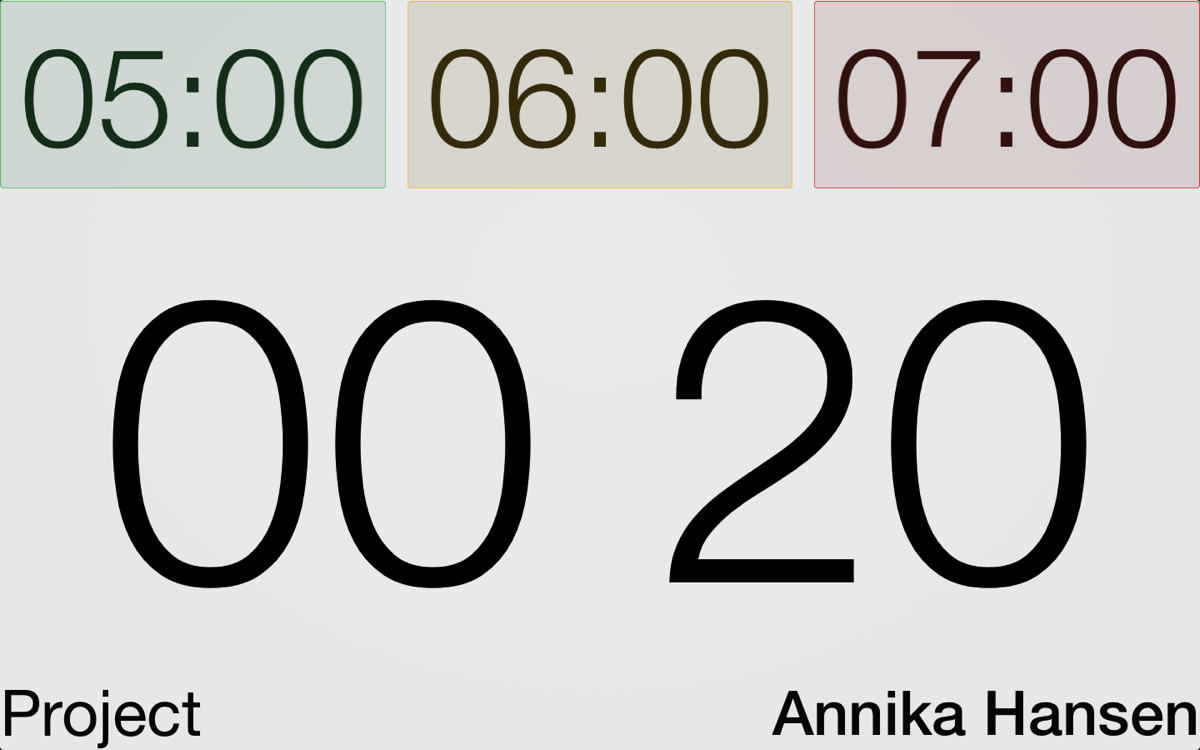
Pinching the trackpad will resize this window, making it convenient if you only have one screen and thus you’ll need to use both the Timer Display and Timer Control windows on the same screen. Double-clicking on the Timer Display window will toggle its full screen mode so that you can easily move this window to the projection screen and enlarge it to fill the display.
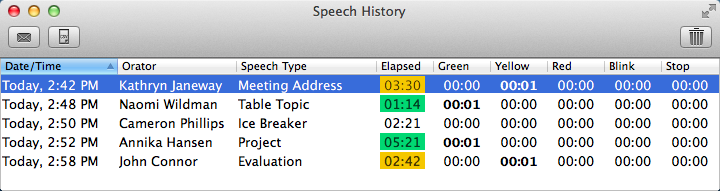
Speech History Window
The Speech History window allows you to create Timer’s Report and distribute it to everyone involved. It shows the speeches that were timed so far and provide you with the option to export this list via e-mail or save a copy as a CSV file for further use by a spreadsheet application such as Excel or Numbers.
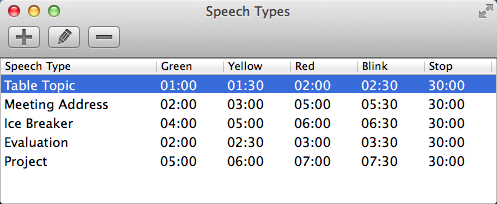
Speech Types Window
In this window you can modify existing speech types or create your own speech types. The time mark values are shown to the right of the Speech Type names. Speech Types Window
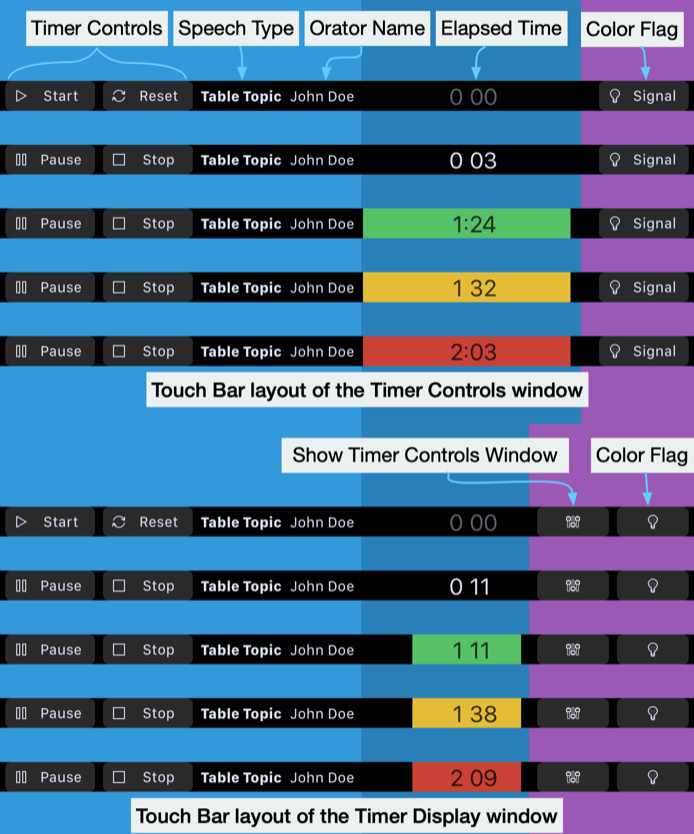
Touch Bar
Speech Timer for macOS provides full support for the Touch Bar featured in some MacBook Pro models. You can control the timer from the touch bar – including starting the timer, stopping the timer, and flagging the orator. Furthermore the elapsed time, orator name, and speech type is also mirrored in the touch bar.
The following figure shows the layouts of the touch bar when the focus is on the Timer Controls window or the Timer Display window.